
Social video platform services such as YouTube Gaming, Hitbox.tv, and Twitch offer gamers an opportunity to turn their recreational hobby into an interactive gaming experience that others can enjoy. Streaming services are about more than just technology – they’re about cultivating and empowering a community of fans and gamers.
Live streaming is a popular way for enthusiasts to stream gameplay through a social network that connects friends and fans over a shared love of games. It’s more than just a spectator experience. Users can use audio and chat to enable streamers and their audiences to interact in real-time.
Twitch, which is owned by Amazon, has arguably become the dominant live-game streaming platform. It last reported 100 million active users. Users can stream gameplay from iOS, Android, Xbox One, Xbox 360, PlayStation 4, Chromecast, Fire TV, and Nvidia Shield devices. The best part? It’s free to participate on either side of the stream.
So how do you stream Android, iPad, and iPhone games to Twitch? What software do you need? And how can our Reflector software help? It's easy after a brief setup.
Step 1: Create a Twitch Account
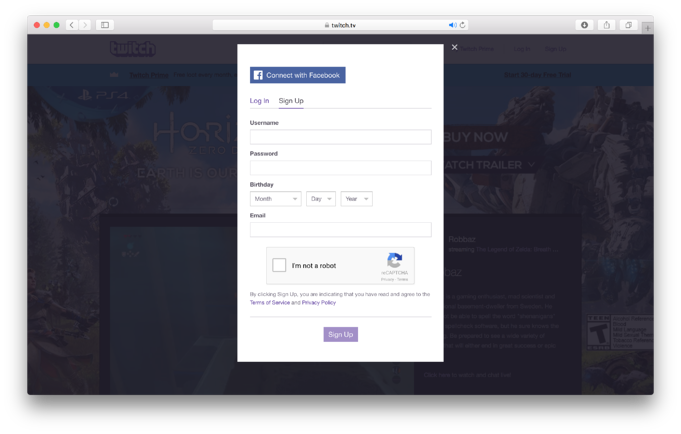
To start streaming, you need to sign up for the streaming service, Twitch. On the top right of the Twitch website, select “Sign Up” to create your account. Don’t worry, it’s free!
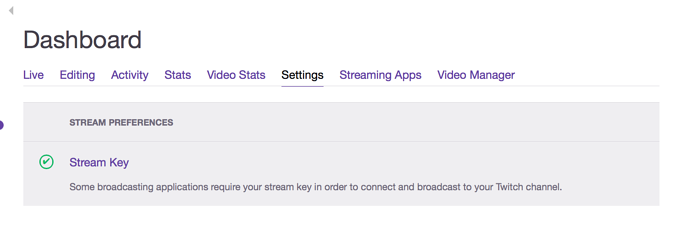
After creating your Twitch account, visit your Twitch dashboard page and click on the “Stream Key” tab. Click the “Show Key” button. Save the key, as you will need it later.
Note:
DO NOT share this key with anyone. Access to this key will allow anyone to stream on your channel.
Step 2: Download and Install Open Broadcasting Software (OBS)
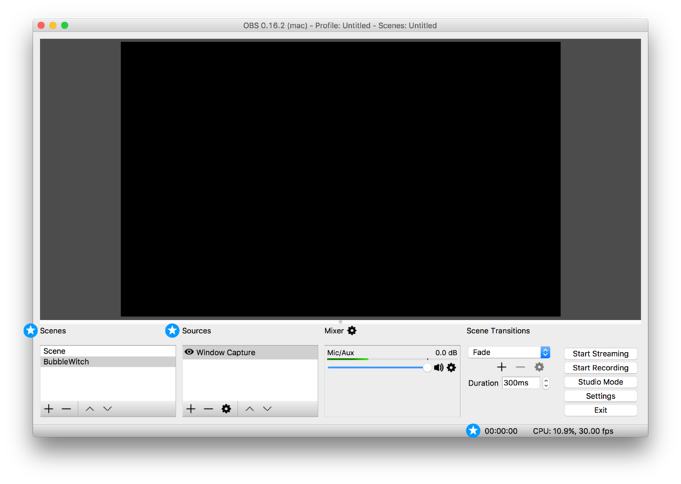
Now that you have a Twitch account, you will need to download and install OBS (also free) to share your gaming with the world. This software is compatible with Windows, Mac, and Linux. Below is a quick reference to a few of the interface elements we will touch on:
Scenes – This is where you can manage all the different scenes you want to stream or record. A scene is what gets transmitted in your video feed.
Source – A source is where you choose where your stream comes from. For example, a “Game Capture” source will take a direct feed from a game window.
Status – At the bottom of the window, there is a status bar that shows you how long your stream has been running, how many frames have been dropped, the stream’s frame rate, and the upload rate
Step 3: Stream Mobile Games to Twitch
- To start, open Reflector 4 on your Mac or Windows computer to wirelessly mirror your device screen to your computer instead of using a cable. Connect your mobile device to Reflector using its native AirPlay or Cast technology. We recommend mirroring your device screen to Reflector first.
- Open OBS and sign in to your Twitch account.
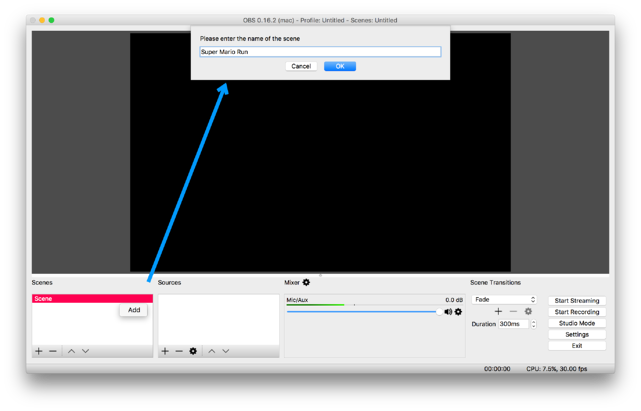
- Right-click the “Scenes” box in the lower left-hand corner of OBS and click “Add.” You can name the scene whatever you like.
- Right-click on the Source box and select “Add” just like you did with the scene.
- On Mac: Select “Window Capture” from the list of choices and name it whatever you like.
On Windows: Select "Display Capture," "Create New," and name it whatever you like. Your entire desktop will then appear in the OBS Window. The desktop will appear repeatedly as if you're looking through a mirror. This is normal and will be corrected in the following steps. - On Mac: Select “[Reflector 4]” with the corresponding name of your device in the properties box.
On Windows: Under Sources, right-click on the newly created display capture and go to "Filters." Click the “+” button and select "Crop/Pad." Name the filter and press "Ok." - On Mac: Click “Ok” and your device screen will appear in the OBS stream window.
On Windows: Adjust the settings so that only the device you’ve connected is shown in the window. Press "Close."
Step 4: Link Your Twitch account to OBS
Remember your stream key from Twitch? You will use that to link your Twitch account to your OBS software.
- Click on the “Settings” in the bottom-right of the OBS.
- Select the “Stream” tab
 Copy and paste your key into the “Stream Key” box.
- Make sure Twitch is selected in the “Service” box and “Streaming Services” is selected in “Stream Type.”
- Close the settings and click “Start Streaming” in the bottom right-hand corner of your OBS software.
- What you see in the OBS window should be the same image that appears in your “Video Preview” on your Twitch dashboard page and on your channel homepage.
Note: It may take a few minutes to connect depending on your network conditions.
Step 5: Record and Upload Mobile Gameplay to Twitch
Live streaming not for you? You can record and upload your mobile gameplay videos, too.
- Follow the same instructions listed above and click “Start Recording” instead of “Start Streaming” in OBS.
- To change the recording path, or the save location, go to “Settings” in OBS and select the “Output” tab.
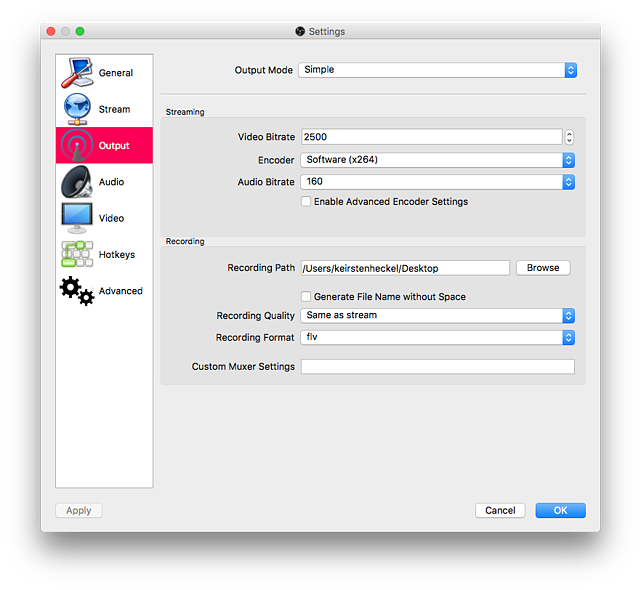
- Under “Recording” you can browse your computer to select a destination to save your videos.
- Head back to your Twitch account.
- Under “Video Manager,” select the “Upload” tab across the top. From there you can either:
- Drag and drop your file, or
- Click the “Upload” button in the top right-hand corner.

Now you’re ready to share your gaming skills with your Twitch audience!